This Canva tutorial (from our other blog) will show you how to use it to create amazing social media, blogging and sales content. Once you learn to use this graphic design tool, you'll be cranking out content that attracts more of your ideal clients, and boost engagement and conversions.
Affiliate Disclosure: This page may contain affiliate links. This means that I will receive a small commission if you make a purchase using these links. Using these links has no impact on you or your purchase at all.
It's a browser-based design tool, which means it can be used on your laptop or desktop computer. You can also download their handy mobile app for use on your cell phone.
You can take a picture or video on your cell phone and upload it to Canva an add text, branding, colors, shapes and other enhancements, that makes it more attractive to your audience when you upload it to social media, YouTube or other online content.
Since it's browser based, you can start your image or document on your cell phone, and pick up where you left off, finishing it up later using your laptop which makes it super flexible.
This will become an indispensable tool that makes it easy to create professionally styled images for your sales and marketing needs.
"Done for You" Canva Templates
Use these templates have already been created to jump start your ability to build social media marketing campaigns, course workbooks, lead magnets and more. Just add your colors, fonts and images to make them your own.
-
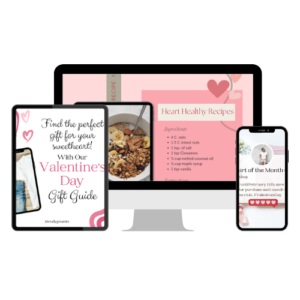
Valentine’s Day Social Media Templates for Facebook and Instagram Posts
$19.99 Add to cart -
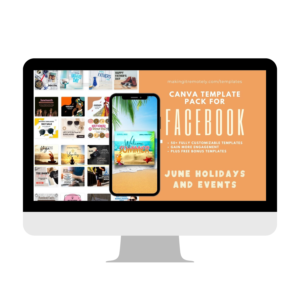
Canva Facebook Templates for June Social Media Posts
$19.99 Add to cart -
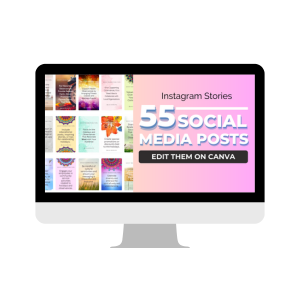
Canva Instagram Templates for Holiday Social Media Posts
$24.00 Add to cart -

Boss Lady Mega Workbook Template for Canva
$39.00 Buy product
Canva's Free Account
This is the way many entrepreneurs, educators and people in general, start using the design tool. This allows you to test the features for your business and personal use. Starting with the free version gives you the following benefits:
If you haven't already, head over to Canva.com and sign up. If you’re new to Canva, you’ll be able to set up an account. When you set up your account, you can choose from a free or pro account depending on your needs.
Introductory Video: Canva Walkthrough
The Canva Pro Account
With the pro plan you get everything in the free plan plus the following benefits:
How Much Does Canva Pro Cost?
Canva Pro costs $12.99 per month, $119.99 annually (translates to $9.99 per month) but the great thing about it is that they have a team plan that will allow you to add additional team members at no additional cost!
That way you and your team can create, collaborate and approve with one account. You can use that account to create a workflow that increases productivity, helping your business to run like a well oiled machine!

Once your account is set up and you have chosen your plan, you can start designing by choosing a template from their huge selection.
If you’re posting your image on social media, they have sizes for each platform ready and available for use on most popular platforms.
How to Start Creating
You can start your project by selecting for example, a Pinterest image, a Twitter post, a Facebook post, presentation templates and more. You can also start with a blank canvas.
For the purposes of our example, we’ll start with a blank background. Follow along to create your first image.
You can start your project by selecting for example, a Pinterest image, a Twitter post, a Facebook post, presentation templates and more. You can also start with a blank canvas.
For the purposes of our example, we’ll start with a blank background. Continue through this post to create an image.

This image was created using Canva.
Set Your Background
From the home screen, choose template. Next choose the document type you want to work with. Once you select your document type you will see a blank in the top left corner of the screen that says "create a blank" document.
This is a blue gradient background

This is a Canva background
Click on the blank document and a new document will be created and open in a new window inside Canva.
Starting with our blank canvas, let’s choose a background. You can pick from a single color, gradient or pattern. There are abstract images and even photos to choose from in the menu on the left.
You can also select a photo and add this to the background. This includes photos you upload.
Textures like this city gradient looks pretty good.
Add an Image or Primary Element

Go to 'elements' and select a photo or a graphic to add to your image.
Go to ‘text’ on the left-hand menu and there are options to choose a simple text box or font combinations and effects.
Choose a font combination idea to start with. Type in the text or a quote you want to use.
Select the one you want and place it in the desired location on the image. Use the dots in each corner to size the text to the desired size.
You'll see purple lines that will help you center the elements you place on the image.
Add Your Company Name, Logo or URL
The next step in this Canva Tutorial is to add your URL, blog name or logo to the image. To add text, select a text box and move it onto your image. Move it to the bottom as shown in the image below.
To add an image, choose 'upload file' and upload an image and/or your logo to Canva. Then select and drag it over to your image.
You can change the size and also match up the fonts with the ones used in your image. Just select the font menu or the size menu along the top.

Finish and Save
Give your image a name that will help you spot the file on the computer. Be sure to include any relevant keywords in the name of your file.
If you don't add a name for your file, it will default to the words on the screen or sometimes to ‘untitled’.
Then use the ‘download’ button to download your completed image to your computer. Select your favorite format.
Your image is ready to use!
Video Playlist: How to Get Started
Watch this playlist to learn how to get started with Canva to set up your branding colors, your logo and so much more.
Use the playlist with our free workbook to get ideas of everything you can do with Canva to start making images and products you can earn from!
Third Party Templates for Use with Canva

If you’re interested in using third party social media templates, you have two options.
Of course, Canva provides a whole range of great looking templates. But you can also buy high-quality third-party fonts, and templates and upload them to your pro account.

My favorite font, graphic and social media templates come from the Creative Market community of talented designers.
Be sure to add personalization to any of the templates (Canva or otherwise) you use because lots of other people are using the same templates. It's important to make them your own.
Going Beyond the Basics
This Canva tutorial takes you beyond creating a basic image like the one we made in the video. The information we'll discuss in the rest of the article will extend past the basic level and enter into the intermediate features.
It's a great idea to play around with the elements we are talking about in this part of the tutorial.
Add Effects to Fonts
One of the cool features is font effects. Some of these are also pretty retro!
You can use them to make words on a graphic stand out.
There are also animated options!
Go to ‘text’ on the menu and choose an effect you like.
Then click ‘effects’ along the top menu to see what you can do with it.
For example, here, you can use shadow or lift. You can make the words hollow, slice or echo. Plus, you can change the color of the shadow!
Charts and Graphs
For things like infographics, charts and graphs are really important.
And there’s a whole range you can make in Canva.
Go to the ‘elements’ option on the menu and scroll to ‘charts.’
Then you can choose from the type of graph or chart you would like to use.
If you choose something like a bar chart, you can input information like you would on a spreadsheet. You can even import data from Google Sheets!
You can change the colors on the chart too.
Icons
Under Elements, you’ll find loads of icons to use in your designs.
From simple line icons to full visual images, there are tons of choices in Canva.
In the ‘Elements’ menu, type in what you want. Select the one you want and move it into place on the design.
With some elements, you can even change the colors! This is great to keep your branding intact.
Stickers
Stickers are like animated icons. They add movement to a graphic which is popular for lots of social media sites.
There are word stickers, arrows, shapes, and even emojis. Plus, there are seasonal ones to use. You know I love using holidays for social media!
Use stickers to highlight a call to action, emphasize something important, or just to grab attention.
Gradients
Gradients are a big trend and a fun way to add color to a design.
There are all kinds of shapes in Canva with pre-made gradients.
Plus, you can change the colors on them to match your branding or design.
Did You Know You Can Pick Colors from a Photo Used in Your Image?
If you want to make colors match a photo, that often gets tricky.
But Canva now helps with this.
When you have a photo on a canvas, it will have a small palette of colors appear when you select the color option.
These come from the photo.
They appear just above the default colors and below any brand colors
Styles
If you select the ‘more’ option in the menu and choose Styles, there’s another handy feature.
This is a selection of trending colors with font pairings.
So, if you don’t want to use your branding, these are brilliant.
You can also select just colors or just fonts.
Animate a Graphic
The most basic is to animate a graphic.
When you have a design, there’s an ‘animate’ option on the top menu.
There are seven free options and five more for paid Canva users. They all make the elements in the design move in different ways.
And they download as a video file!
Video Stock Images
Along with stock images, there is now a selection of stock video in Canva.
This is available on the side menu under ‘video.’
You can add these to your designs or upload your own video as well.
Add a Video to a Template
You can add a video to a template in the same way as an image. These can be videos you upload, or their stock ones.
Simply drag and drop the video where you want it on the template.
Add Music to a Video
In the ‘more’ menu there’s also a selection of music.
If you create a video, you can add a soundtrack to it!
Some are on the free plan and others for the Pro.
Schedule Your Posts Without Leaving the App
Canva does have the option to post straight to social media. It’s something worth trying if you don’t have a scheduler yourself.
Canva also integrates with loads of other apps.
This includes things like Google Drive or GIPHY.
You can import images from Box of Flickr. Or add more emojis.
Just go to the ‘more’ side menu and there’s a whole list of them.
Other Canva Features
There’s an option to have your designs printed. This is great for things like business cards, invitations and flyers.
If you go into the download menu in the top right corner and select more, the options appear.
Canva has become my "go to" tool for quick designs, and even product creation! Once you start using it, you will feel the same way.
There is so much to cover with Canva, and we haven't even scratched the surface.
Get Our Free Canva Cheatsheet
Download an easy to use cheatsheet that introduces Canva and shows you how to get results with this amazing tool!

